

Are you considering building your own AI chatbot? It’s simpler than it sounds!
Even if you have beginner-level knowledge of computers, with the help from our guide, setting up an AI ChatGPT can be a breeze. We’ll outline step by step how to get started on any platform—Windows 11 (or Windows 10 and other versions), macOS, Linux or ChromeOS — so no matter what device you’re using at home right now there are options for getting creative with this tech project. Plus good news: You don’t need a super computer to build one. All the heavy lifting is done through OpenAI’s API in their cloud environment – So let’s not waste anymore time and get set up!
Ready to Create an AI Chatbot? Let’s Set Up the Software Environment!

Everyone’s talking about AI chatbot powered by ChatGPT, but don’t let the tools intimidate you! It turns out that anyone can launch their own bot with just Python, Pip, OpenAI and Gradio libraries , an OpenAI API key and a code editor like Notepad++. No need for heavy coding skills – follow these simple steps to get your chatbot up-and-running in no time.
Install Python
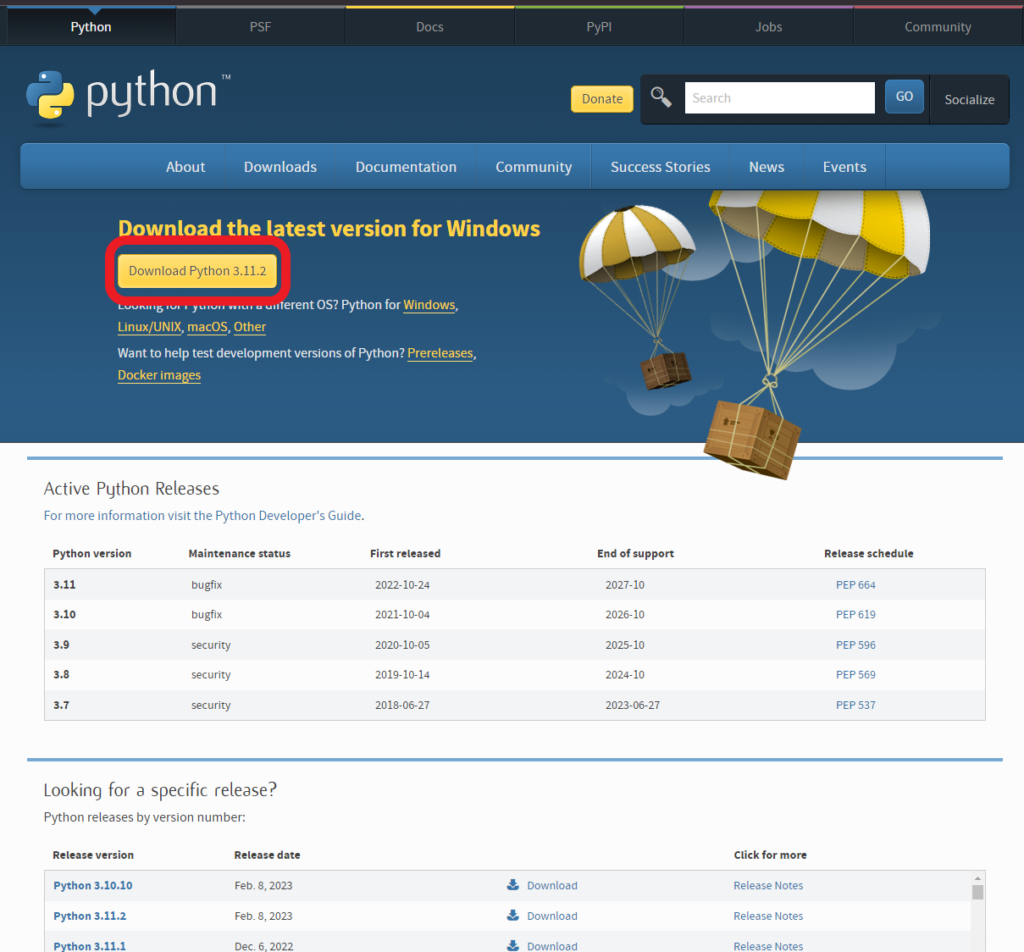
Your journey to learn Python just became a whole lot easier! Getting started is as simple as one-click: all you have to do is click this link, select the appropriate setup file for your platform, and download it onto your computer – boom. You’ve got everything you need now start diving into the world of programming with Python!
Installing Python on your machine can seem like a daunting task at first, but this step-by-step guide will make it quick and easy!
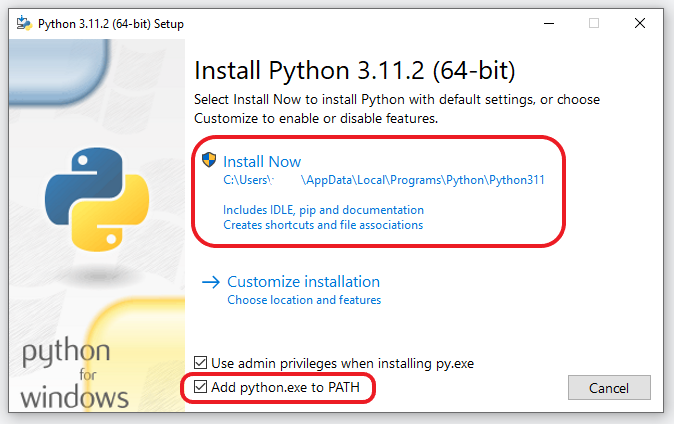
First thing’s first: run the setup file. Be sure to enable the checkbox for “Add Python.exe to PATH,” which is absolutely essential for successful installation – don’t forget about that one important detail!
Final touches? Click “Install Now” and follow along with all of the typical instructions from there. In no time you’ll be up & running in a world powered by Python programming language!
Have you ever wondered how to check if Python is set up properly on your computer?
It’s easier than you think! All it takes is a few quick steps. First, no matter what platform your using – Windows, Linux or something else – open Terminal (or Command Prompt for those running Windows). Then plug in the command $ python –version and hit enter.
If all goes well, this should output the version of Python installed on your machine; however alternatively some platforms may require their own specific commands such as
$ python3 --version
And that’s it-now explore away with peace of mind knowing that everything was correctly configured!
Upgrade Pip
With Python comes Pip, the powerful package manager that gives you access to thousands of libraries right from your terminal. Unlocking incredible capabilities like OpenAI and Gradio has never been so easy! In this article, we’ll walk through upgrading Pip to its latest version—so get ready for more possibilities with python than ever before!
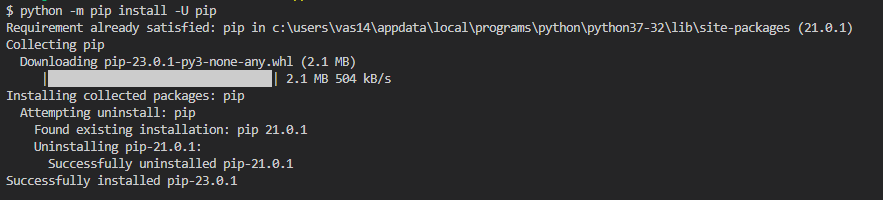
Getting your environment set up can be a bit of an intimidating task, but don’t worry! With just one quick command you’ll have everything ready to go. If you’re using Windows Terminal then try running the below code in order to update Pip – easy peasy right? For Linux or other platforms remember that it’s python3 and pip3 instead.
python -m pip install -U pip
Install OpenAI and Gradio Libraries
It’s time to get up and running with the OpenAI library! All you need is a simple command in your Terminal. Before you know it, ChatGPT will be right at your fingertips – just run pip or if that doesn’t work give pip3 a try for seamless integration of this powerful library into all of your coding projects.
pip install openai
Ready to show off your AI chatbot? Gradio has you covered! This super simple tool allows users to quickly put together a friendly and interactive web interface, so others can appreciate the fruits of their labor. Then, it’s as easy as sharing that link with people online – in no time at all they’ll be testing out your unique bot creation!
pip install gradio
Are you ready to start coding?
Before you can get started, make sure that you have a code editor downloaded.
It’s time to get coding! Whether you’re comfortable with powerful IDEs or just starting out, there are options for any level of experience. On Windows I recommend Notepad++ to start with; simply download and install the program via the link provided–it couldn’t be easier. If macOS or Linux is your thing then Sublime Text is a great choice; again all you need do it head on over to their website and follow some simple installation instructions – job done in no time at all! And if none of those take your fancy VS Code will work across many operating systems so can find exactly what works best for you… happy coding everyone 🙂
With the installation of our software environment nearly complete, it’s time to unlock a world of possibilities with an OpenAI API key! This essential tool will enable us to take full advantage of this powerful technology and open up new doors for what stands possible. Get ready; success awaits us around every corner!
Unlock OpenAI’s Limitless Potential – Get Your Free API Key Today!